


Nella stampa 3D, la densità di riempimento indica quanto sia solido o cavo l'interno della tua stampa. Influisce sulla resistenza, sul peso e sul tempo necessario per stampare un oggetto. Ottenere il giusto riempimento aiuta a risparmiare materiale e tempo, assicurando che l'oggetto funzioni come desiderato.
Cos'è la Densità di Riempimento?
Bilanciamento tra Resistenza e Utilizzo di Materiale
Trovare l'Impostazione Ottimale
Modelli di Riempimento Radi e Specializzati
Integrazione Software e lo Slicer
L'Impatto Più Ampio sulle Stampe
Considerazioni Specifiche per Materiale: ABS
Cos'è la Densità di Riempimento?
La densità di riempimento nella stampa 3D si riferisce alla struttura interna di un oggetto stampato. Invece di essere solido, la maggior parte delle stampe presenta un motivo a reticolo interno che fornisce supporto strutturale risparmiando materiale. Questa densità è espressa in percentuale, dove 0% significa che l'oggetto è completamente cavo (senza riempimento) e 100% significa che è completamente solido. La scelta della densità di riempimento è un'impostazione primaria in qualsiasi software slicer e determina direttamente le proprietà meccaniche dell'oggetto e il consumo di risorse. Allo stesso modo, quando si parla di densità di riempimento della stampante 3D, ci si riferisce alla capacità specifica di una stampante e del suo software di generare e stampare accuratamente queste strutture interne alla percentuale definita dall'utente.
Bilanciamento tra Resistenza e Utilizzo di Materiale
La relazione tra densità di riempimento e resistenza nella stampa 3D non è lineare ma segue una curva di rendimenti decrescenti. Inizialmente, un piccolo aumento della densità di riempimento, ad esempio dal 10% al 20%, comporta un significativo guadagno in resistenza e rigidità. Questo perché il motivo di riempimento distribuisce efficacemente lo stress in tutto il pezzo. Tuttavia, quando la densità continua ad aumentare oltre il 40-50%, i guadagni in resistenza del riempimento diventano meno pronunciati. Il pezzo diventa più pesante, utilizza più materiale e richiede tempi di stampa considerevolmente più lunghi, spesso per un miglioramento marginale delle prestazioni. Pertanto, identificare la densità ottimale per un'applicazione specifica è fondamentale per una stampa efficiente.
Trovare l'Impostazione Ottimale
Determinare la migliore densità di riempimento per la stampa 3D dipende fortemente dall'applicazione e non esiste un valore "migliore" universale. Per prototipi non funzionali, modelli visivi o oggetti decorativi, una densità bassa del 10-15% è spesso sufficiente per fornire una struttura di base riducendo al minimo tempo e materiale. Per parti funzionali, componenti meccanici o oggetti che sopporteranno stress, si consiglia in genere una densità tra il 25% e il 50%. Per parti che richiedono la massima resistenza, come utensili o ingranaggi ad alto stress, possono essere necessarie densità dal 75% al 100%, accettando i costi associati in termini di tempo e filamento.
Modelli di Riempimento Radi e Specializzati
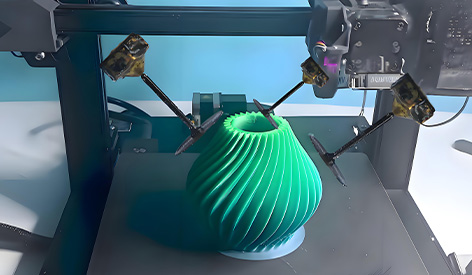
The term 3d printing sparse infill density is often used to describe the use of lower density percentages. "Sparse" infill implies that the internal structure is not dense, focusing on creating a supportive scaffold rather than a near-solid core. This is the standard approach for most prints to achieve efficiency. In contrast, 3d printing vase infill density is a unique case. When using the "Vase Mode" or "Spiralize Outer Contour" feature, the infill density is effectively 0%. The print consists of a single, continuously extruded wall, making it perfect for water-tight, decorative objects like vases or planters but offering no structural strength.
Integrazione Software e lo Slicer
While not a slicer itself, 3D modeling software like Blender can be used to prepare models for printing. However, the setting for Blender 3d printing infill density is not typically applied within Blender. Instead, models are designed and exported as STL or OBJ files. The infill density is then assigned in a dedicated slicer program (like PrusaSlicer, Cura, or Simplify3D) where the user can specify the percentage, pattern, and other critical printing parameters before generating the toolpath (G-code) for t
he printer.
L'Impatto Più Ampio sulle Stampe
The effect of infill density on 3d print extends beyond just strength and weight. It significantly impacts print time and material consumption; higher densities can double or triple both. It also influences surface quality; very high densities can lead to minor top surface pillowing due to sagging over dense infill, while very low densities might not properly support upper layers. Furthermore, infill density affects part flexibility in certain materials and plays a role in thermal properties for parts used in high-temperature environments.

Considerazioni Specifiche per Materiale: ABS
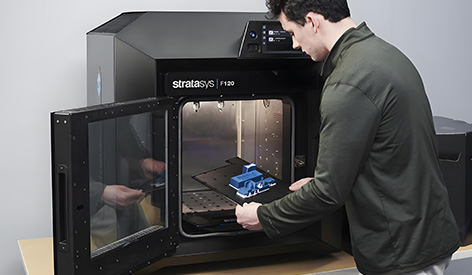
When discussing infill density 3d printing abs, material properties introduce additional considerations. ABS filament is prone to warping and shrinkage during cooling. A higher infill density can increase internal stresses within the part, exacerbating these issues and potentially leading to layer adhesion problems or part deformation. Therefore, for ABS prints, it is often advisable to use an infill density that is adequate for the part's function but not excessively high. A range of 20-40% is common, coupled with an appropriate infill pattern like gyroid or rectilinear that helps manage internal stresses, and always in an enclosed printer to minimize drafts and temperature fluctuations.
Infill density is a powerful tool in the 3D printing workflow, offering a direct means to customize the properties of a printed object. By understanding the relationship between density, strength, weight, and print time, users can make informed decisions that optimize their prints for specific applications. Whether aiming for a lightweight prototype or a heavy-duty functional part, mastering infill density is essential for efficient and effective stampa 3D. The key is to always match the infill density to the final purpose of the object, avoiding both the waste of excessive material and the weakness of insufficient support.

