


Nel mondo della produzione additiva, il successo dipende dalla perfetta calibrazione di numerose variabili. Sebbene molta attenzione sia dedicata all'altezza dello strato, alla velocità di stampa e alla temperatura, uno degli aspetti più critici ma spesso sottovalutati è il riempimento. Questa struttura interna, nascosta tra i gusci esterni di una stampa 3D, è la spina dorsale della tua creazione, determinandone resistenza, peso, tempo di stampa e utilizzo del materiale. Selezionare il tipo di riempimento giusto non è un semplice ripensamento; è una decisione ingegneristica fondamentale che colma il divario tra un prototipo fragile e una parte funzionale e durevole.
Comprendere il nucleo: cos'è il riempimento nella stampa 3D?
Un catalogo di modelli di riempimento comuni
La ricerca della velocità: qual è il riempimento più veloce?
Oltre l'interno: il ruolo delle pareti di riempimento
Il riempimento come struttura di supporto
L'impatto del tipo di riempimento sulle stampe 3D
Comprendere il nucleo: cos'è il riempimento nella stampa 3D?
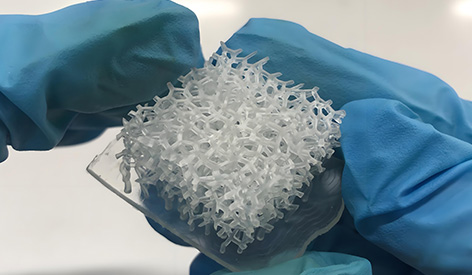
Prima di addentrarci nelle varietà, è fondamentale comprendere la spiegazione di base del tipo di riempimento per stampante 3D. Il riempimento è il modello interno che una stampante 3D crea per riempire un oggetto stampato. È tipicamente espresso come densità percentuale. Una densità del 0% significa che l'oggetto è completamente cavo, mentre una densità del 100% indica un oggetto completamente solido. Tuttavia, stampare al 100% di densità è raramente pratico a causa dell'eccessivo consumo di materiale e del tempo di stampa. Invece, una densità di riempimento inferiore con un modello scelto saggiamente fornisce un rapporto ottimale resistenza-peso. Lo scopo principale del riempimento è fornire integrità strutturale, supportare gli strati superiori della stampa (prevenendo l'abbassamento) e, in alcuni casi, aggiungere proprietà meccaniche specifiche come flessibilità o assorbimento degli urti.
Un catalogo di modelli di riempimento comuni
Il panorama dei tipi di riempimento per la stampa 3D è diversificato, ognuno con vantaggi unici e casi d'uso ideali. Comprendere questi diversi tipi di riempimento per la stampa 3D è fondamentale per padroneggiare la qualità di stampa.
Rettilineo e griglia: questo è uno dei modelli più semplici e veloci. Consiste in una semplice griglia di linee parallele in direzioni alternate per ogni strato. Sebbene veloce, può essere debole sotto determinate forze di taglio perché le linee non si interconnettono tra gli strati in modo robusto.
Riempimento cellulare: il paradigma della resistenza
Quando si parla di tipo di riempimento cellulare per la stampa 3D, ci si riferisce spesso a modelli che imitano strutture naturali, come i favi. L'esempio più famoso è il modello esagonale o a nido d'ape. Questo design è rinomato per il suo eccezionale rapporto resistenza-peso. Le celle esagonali distribuiscono lo stress uniformemente in tutte le direzioni, rendendolo ideale per parti funzionali che devono resistere a forze multidirezionali. La sua natura interconnessa fornisce un'eccellente stabilità.
Another star in the cellular category is Gyroid. This is a complex, tri-periodic minimal surface pattern that appears as a series of swirling, interconnected waves. Unlike grid patterns, the Gyroid is isotropic, meaning it has nearly identical strength properties in all three dimensions (X, Y, and Z). It also allows for easier resin drainage in SLA printing and performs exceptionally well for flexible materials because it can compress and rebound without collapsing.
La ricerca della velocità: qual è il riempimento più veloce?
For many users, especially during prototyping, print speed is paramount. So, 3d printing whats the fastest infill type? The answer is typically Lines (or Rectilinear) and Grid. These patterns require the least number of directional changes for the print head, allowing it to maintain high speeds with consistent extrusion. Their simplicity means less computational overhead for the slicer and fewer retractions. However, this speed comes at a cost: reduced strength. For non-functional models or quick drafts, these are perfect. For stronger parts that still print relatively quickly, Cubic and Cubic Subdivision offer a good middle ground, providing better strength than a grid without a massive time penalty.
Oltre l'interno: il ruolo delle pareti di riempimento
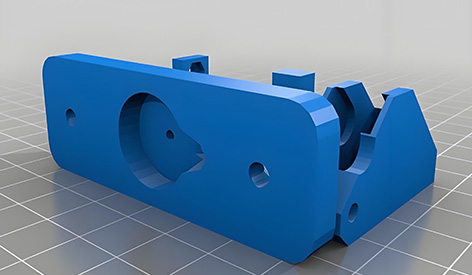
A crucial factor that interacts directly with the infill is the perimeter, or the different types of infill walls. The infill walls are the outer shells that define the shape and surface quality of the object. The relationship between the wall count and the infill is synergistic. A common rule of thumb is that more perimeter walls often contribute more to a part’s strength than increasing the infill percentage. For instance, a part with four walls and 15% infill can be significantly stronger and have a better surface finish than a part with two walls and 40% infill. The walls bear the brunt of external stresses and provide a solid anchor for the infill to support internal loads.
Il riempimento come struttura di supporto
A highly specialized application of infill is for 3d printing different types of infill for supports. Standard support structures are often dense and difficult to remove. However, some advanced slicers allow for using specific infill patterns for supports. For example, using a Gyroid or Lightning infill for supports can drastically reduce material usage and print time while making the supports much easier to break away from the model. This approach creates a strong yet sparse support structure that adequately holds up overhangs but is not fully solid, easing post-processing.
L'impatto del tipo di riempimento sulle stampe 3D
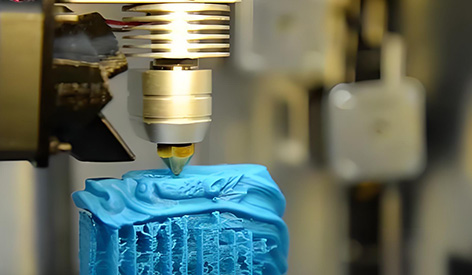
The choice of pattern has a profound impact of infill type on 3d prints, influencing far more than just strength.
Mechanical Properties: This is the most direct impact. A Hexagonal pattern excels in compressive strength, making it great for parts that will be load-bearing. A Gyroid or Cubic pattern offers superior all-around strength and layer adhesion. For parts that need to bend, a Grid or Lines pattern might allow more predictable flex than a rigid cellular structure.
Print Time and Material Use: As discussed, simple patterns like Lines are fastest. Complex, continuously curving patterns like Gyroid require more printer movements and can slightly increase print time but often use material more efficiently for the strength achieved.
Top Surface Quality: The infill must adequately support the top layers. A sparse or poorly chosen infill can lead to "pillowing," where the top layers sag into the gaps below. Denser infill or patterns with good support distribution, like Gyroid or a high-density Grid, create a smoother top surface.
Weight and Buoyancy: The infill percentage and type directly control the final weight of the object. This is critical for applications like drones or RC vehicles, where every gram matters. Some patterns achieve stiffness with less material, aiding in weight reduction.
There is no single "best" infill type. The optimal choice is a strategic decision based on the intended use of the printed object. Is it a decorative vase? Use 0-10% Lightning infill to save time and material. Is it a tool handle that needs to withstand impact? A higher density of Cubic or Gyroid is a superb choice. Is it a prototype that needs to be ready in an hour? The speedy Rectilinear pattern will suffice. By understanding the different types of infill 3d printing provides and their specific properties, makers and engineers can transcend basic printing and elevate their creations to new levels of performance and efficiency.

