
Creating STL files for 3D printing is a fundamental skill for anyone entering the world of additive manufacturing. Whether you're a hobbyist, engineer, or designer, understanding how to generate and optimize STL (Stereolithography) files ensures successful prints. This guide covers the entire process—from design to export—while also exploring advanced techniques like DMLS printing and software tools such as 3D Printing Software Adventure 3 Pro.
Understanding STL Files
STL is the standard file format for 3D printing, representing a 3D model as a mesh of triangular facets. The simplicity of this format makes it universally compatible with most 3D printers and slicing software. However, creating a high-quality STL file requires attention to detail in modeling, resolution, and export settings.
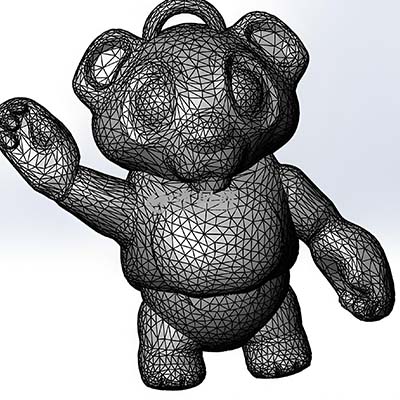
Understanding STL Files
STL is the standard file format for 3D printing, representing a 3D model as a mesh of triangular facets. The simplicity of this format makes it universally compatible with most 3D printers and slicing software. However, creating a high-quality STL file requires attention to detail in modeling, resolution, and export settings.
Step 1: Designing Your 3D Model
Before generating an STL file, you need a 3D model. You can create one using:
Before generating an STL file, you need a 3D model. You can create one using:
- CAD Software (Computer-Aided Design): Tools like Fusion 360, SolidWorks, or TinkerCAD allow precise modeling for functional parts.
- Sculpting Software: Programs like Blender or ZBrush are ideal for organic shapes and artistic designs.
- 3D Scanning: If you need to replicate a physical object, 3D scanners can generate a digital model.
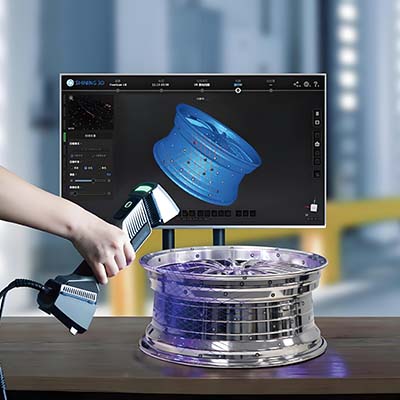
Best Practices for 3D Modeling
- Manifold Geometry: Ensure your model is "watertight" with no gaps or intersecting faces.
- Wall Thickness: Avoid excessively thin walls that may fail during printing.
- Overhangs & Supports: Design with 45-degree angles to minimize support structures.
Step 2: Exporting as an STL File
Once your model is ready, exporting it correctly is crucial:
- Select "Export" or "Save As" in your software.
- Choose STL Format and adjust resolution settings:
- Low Resolution: Fewer triangles, smaller file size (suitable for simple shapes).
- High Resolution: More triangles, smoother curves (ideal for intricate details)
3.Check for Errors: Use mesh repair tools like Netfabb or Meshmixer to fix non-manifold edges.
Step 3: Preparing for 3D Printing
After exporting, use slicing software (e.g., Ultimaker Cura, PrusaSlicer) to convert the STL into G-code. Adjust settings like:
Advanced Consideration: DMLS Printing
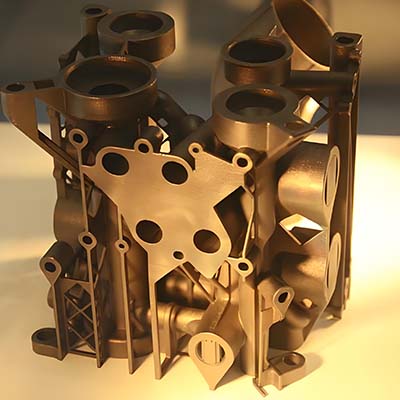
For industrial applications, Direct Metal Laser Sintering (DMLS) printing is a high-precision method using metal powders. Unlike FDM (Fused Deposition Modeling), DMLS requires specialized STL optimization to account for thermal stresses and support structures. Software like Materialise Magics is often used to prepare STL files for DMLS, ensuring minimal warping and maximum part integrity.
Mastering STL file creation unlocks endless possibilities in 3D printing. Whether you're prototyping with FDM or exploring DMLS printing for aerospace components, a well-optimized STL ensures success. Tools like 3D Printing Software Adventure 3 Pro further streamline the process, bridging the gap between design and physical reality. Start experimenting, refine your workflow, and push the boundaries of what you can create.
Step 3: Preparing for 3D Printing
After exporting, use slicing software (e.g., Ultimaker Cura, PrusaSlicer) to convert the STL into G-code. Adjust settings like:
- Layer Height (finer layers = smoother prints).
- Infill Density (higher infill = stronger parts).
- Print Speed & Temperature (optimize for your filament).
Advanced Consideration: DMLS Printing
For industrial applications, Direct Metal Laser Sintering (DMLS) printing is a high-precision method using metal powders. Unlike FDM (Fused Deposition Modeling), DMLS requires specialized STL optimization to account for thermal stresses and support structures. Software like Materialise Magics is often used to prepare STL files for DMLS, ensuring minimal warping and maximum part integrity.
Optimizing STL Files for Different Printers
Not all 3D printers handle STL files the same way. For example, the 3D Printing Software Adventure 3 Pro is tailored for FlashForge Adventurer 3 users, offering intuitive slicing and cloud-based features. It simplifies STL adjustments with preset profiles, making it beginner-friendly while allowing advanced tweaks for experienced makers.
Troubleshooting Common STL Issues
Not all 3D printers handle STL files the same way. For example, the 3D Printing Software Adventure 3 Pro is tailored for FlashForge Adventurer 3 users, offering intuitive slicing and cloud-based features. It simplifies STL adjustments with preset profiles, making it beginner-friendly while allowing advanced tweaks for experienced makers.
Troubleshooting Common STL Issues
- Non-Manifold Edges: Repair gaps using Blender’s 3D Print Toolbox.
- Overly Large Files: Reduce triangle count without sacrificing critical details.
- Poor Orientation: Rotate the model to minimize supports and improve strength.
Mastering STL file creation unlocks endless possibilities in 3D printing. Whether you're prototyping with FDM or exploring DMLS printing for aerospace components, a well-optimized STL ensures success. Tools like 3D Printing Software Adventure 3 Pro further streamline the process, bridging the gap between design and physical reality. Start experimenting, refine your workflow, and push the boundaries of what you can create.

Richiedi il tuo DFM e Preventivo – Carica i tuoi Disegni
ㆍInserisci i tuoi requisiti e carica il tuo file 2D e 3D, ti forniremo il preventivo e il DFM entro 24 ore.ㆍTipi di file: STEP, STP, IGES, IGS, SLDPRT, 3DM, SAT, X_T, DWG, DXF, STL, PDF, ZIP e altri. Dimensione file: < 128 MB Dimensione pezzo: < 1500*1500*1500 mm
ㆍPrivacy: Rispettiamo la tua privacy. Qui puoi trovare un esempio di accordo di non divulgazione. Inviando questo modulo, accetti i nostri termini e condizioni e la politica sulla privacy.
ㆍPrivacy: Rispettiamo la tua privacy. Qui puoi trovare un esempio di accordo di non divulgazione. Inviando questo modulo, accetti i nostri termini e condizioni e la politica sulla privacy.
